

How To Install A Ballast For Fluorescent Lighting
Dan has been a licensed journey-level electrician for some 17 years. He has extensive experience in most areas of the electrical trade.

This article provides information and instructions on changing a ballast in a fluorescent light
Replacing a Ballast in a Fluorescent Light
Replacing a fluorescent ballast is not a terribly difficult job. As a professional electrician, I have replaced hundreds of ballasts, and it normally takes about 10 or 15 minutes if the light fixture itself isn't something special and difficult to disassemble. The job may look a little (or a lot) daunting with all those wires exposed, but it really isn't nearly as difficult as it looks and is often a much better choice than replacing an entire light fixture.
There are three basic steps to changing out a ballast:
- Removing the old ballast
- Choosing a new ballast
- Wiring the new ballast into the fixture
The steps are probably best when carried out in that order because it will be handy to have the old ballast in hand when buying a new one, so let's start with the first task listed.
Removing the Old Ballast
Fluorescent fixtures are designed and built with the idea that the ballast can be changed out one day without removing the whole fixture from the ceiling, but that doesn't mean that it is obvious or even easy for some fixtures.
In general, fixtures that use four-foot fluorescent lamps will have a channel running the length of the fixture, and the ballast is located behind that raised portion of the fixture. While it is sometimes possible to remove a ballast with the lamps in place, it is seldom worth the effort, so begin by removing all the lamps.
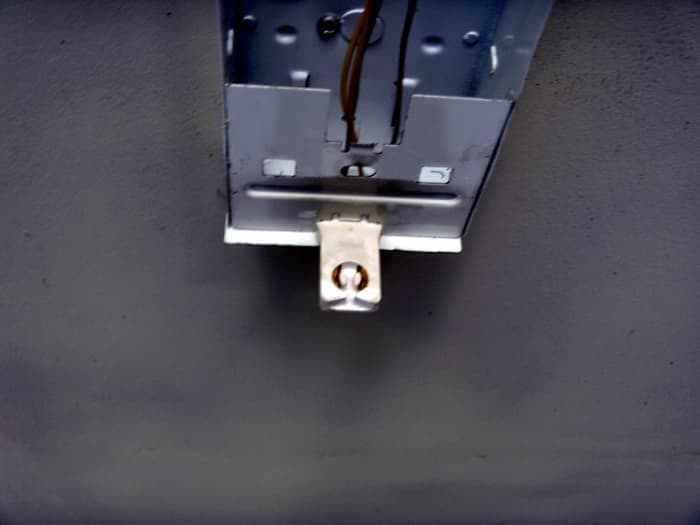
The cheap, "garage" or "shop" lights will have a cover behind the lamps that usually has one fastener on one end of it; twist the fastener ninety degrees and pull lightly to remove the cover. With the fastener removed from the fixture, slide the cover toward that end; the other end has small clips that simply slide into place to hold the cover.
Be careful of the edges of that cover, as it is thin sheet metal and can make a nasty cut if you slide your hand or fingers down the edge! I have been cut clear to bone simply by brushing lightly down the sharp edge of the cover with my hand—don't let it happen to you.

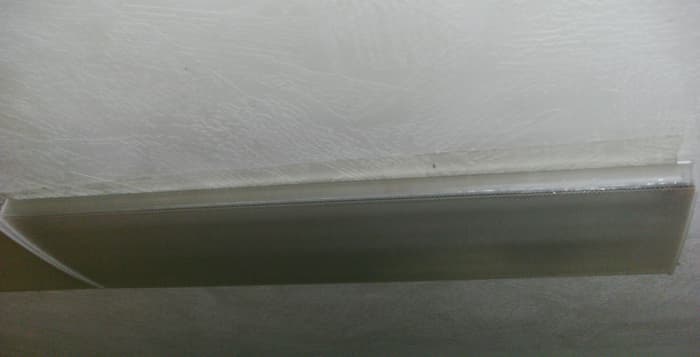
This is actually an 8 foot fixture with 2 four foot lamps. The ballast will be on one end.
Better-quality fixtures will typically need to have a plastic lens removed, then the lamps followed by a sheet metal cover over the ballast.
This cover is removed by squeezing the sides together, pulling the edges of the cover from under small clips on the fixture. Occasionally, the cover may be screwed in place, but that is rather uncommon.
The cover will then need to be worked out from the lamp holders on each end, but this is merely a matter of holding and turning it just right to clear them. The lamp holders do not normally need to be removed.
A better "wrap" fixture with a plastic lens that "wraps" around the lamps and must be removed.
Some lights may need to have the entire reflective shield removed after taking the lamps out, and there will be a variety of possible methods to do this. The shield may be screwed in place, it may have some of the small twist clamps or it might even need to have other pieces removed first. There is no standard method of "hiding" the ballast and it may require some head scratching to find it, but it is always possible.
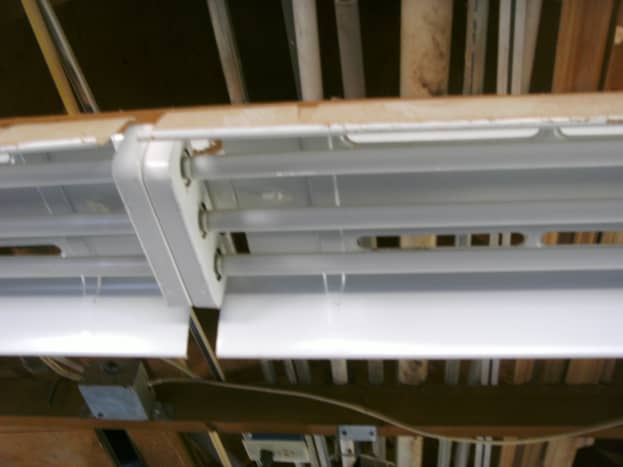
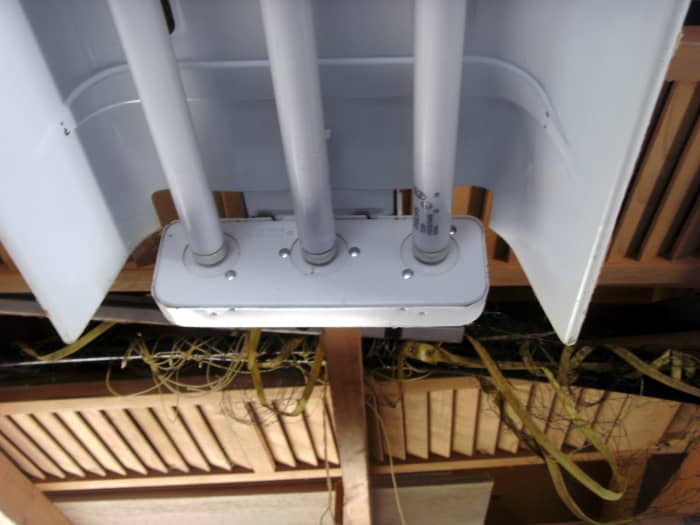
The fixture shown below is an expensive one (often used in large stores) that has been hung in a shop to provide lots of light, but it is still very similar to cheaper home fixtures in what must be done to change a ballast.
Some homes will have a two-foot square fixture and these can require a little more effort as the ballast may be hidden in one end, but it is still a matter of figuring out where it is and removing cover plates to find it. They are intended to be replaceable and can be reached without undue effort.


This fixture needs the entire reflective shield removed. One of the two plastic clips (on near each end) is shown here.
With the cover removed and the ballast exposed it is time to remove the old ballast. Make sure the power is off! I cannot recommend enough the use of a voltage tester here. I always carry a non-contact voltage tester on the job and check everything that even might be powered up. Getting a nasty shock while standing near the top of a ladder isn't much fun - don't let it happen to you.
The switch can be turned off, turning the light off, but if you choose to do this rather than turning the breaker off at the panel it is suggested that you tape the switch(es) off with some electrical tape. It is too common to have someone else walk into the room and automatically flip the switch on as they do, just as you have your hands around the wires they are turning on. Make it obvious that the switch should not be turned on.
However you choose to turn the power off, make sure it is off and will not be turned back on while you are working. Tape the switch off so it can't be turned on by accident or turn the breaker off and tape the panel door shut. You don't want to turn a breaker off and then have someone realize that the lights in another room are off, find the "tripped" breaker and turn it on.
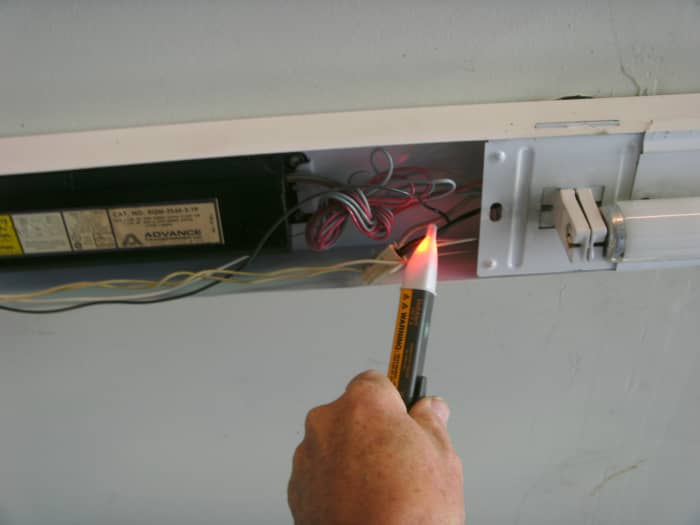
Surprise! This light is still turned on and has hot wires in it.
Wilderness
Read More From Dengarden
Undo the wire nuts on the black and white wires, putting the wire nuts back onto the wire not connected to the ballast as a safety measure. Cut the rest of the wires a few inches from the ballast, using wire cutters.
With covers and lamps out of the way, the ballast is most normally removed by removing a small nut or screw on one end and sliding the ballast towards the screw and out from under the clips that hold the other end.
Safety First, Always!
Personal safety cannot be emphasized enough when working around electricity. The non-contact voltage detector shown above is a perfect example of how to protect yourself. Make sure you work safely, please.
If you need one of these nifty tools, this is one of my favorite AC non-contact voltage testers. The link above will take you to an article listing various models and giving instructions on how to use one.
Choosing a New Ballast
Older ballasts (most likely the one you are replacing) are generally the magnetic type, while newer ballasts are of the electronic variety and are more efficient. Ballasts can be either rapid or instant start, and are specific as to the number and type of lamps they operate. Magnetic ballasts are typical of the rapid start type but can still operate 1,2,3 or 4 lamps and must have the proper number of lamps. Electronic ballasts can operate a fewer number of lamps than they are designed for, but it is still a good idea to purchase the right ballast.
A ballast designed for T12 (the larger diameter 4' ones) will not operate a T8 (smaller diameter but more efficient) lamp even though the T8 lamp is still 4' long. The wattage is different and the ballast must be matched to the proper wattage. Take note of the wattage stamped on the lamp and purchase the appropriate ballast according to what is already in the fixture, the wattage of the lamp and how many lamps that the ballast is operating. Some fixtures have two ballasts in them, so make sure you know how many lamps the replacement ballast must operate.
The older magnetic ballast may be replaced by a newer, more efficient electronic ballast but it will likely require re-wiring the tombstones (lamp holders). Should you choose to do this (recommended) the tombstones will have to be removed as well, the wires removed from them, and new wires put in according to the wiring diagram on the new ballast. The wiring methods may be different for magnetic and electronic ballasts and this must be corrected if the type of ballast is to be changed.
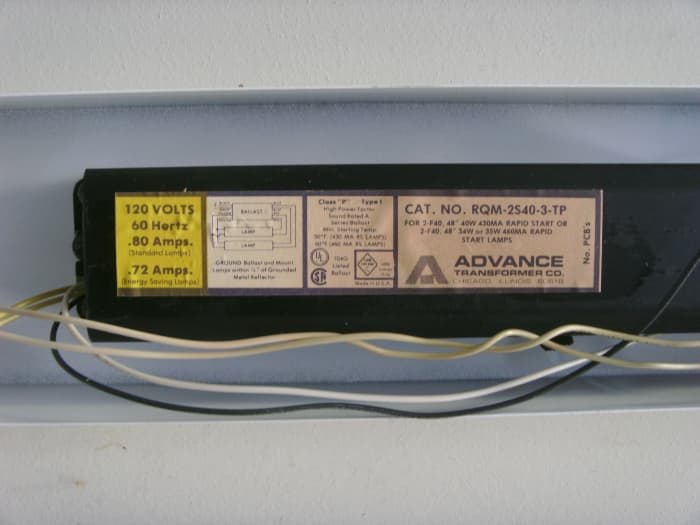
An older magnetic ballast in use.
Wilderness
Installing the New Ballast
You will need a handful of small wire nuts (one for each wire) and a pair of wire strippers.
Attach the ballast in the same manner as the old one. In very rare cases the physical size will be different; if this is the case it can be simply screwed to the top of the fixture with self-tapping sheet-metal screws. Just make sure it is within the footprint of the cover as necessary.
Splice the black and white wires to the matching colors, using the wire nuts that were on them originally.
If the ballast is of the same type as the one removed, match color to color on the wires and splice them together. A red wire, for instance, from the ballast will go to a red wire from a lamp holder and although there may be two from each it won't matter which one goes where. Just don't splice the two red wires from the ballast together thinking one is from a lamp—I've seen this done from the factory and it does not work well!
If a different type of ballast is being used, follow the wiring diagram on the ballast and change the wiring to the tombstone as necessary.
With the wires all attached, replace the ballast cover, lamps and any lens that was removed. Turn the light on to check it.
A typical tombstone on a shop light. It is removed by spreading the sides of the fixture slightly, dropping the metal piece across the center, and sliding the tombstone out.
Wilderness
An unusual set of lamp holders, and probably only available from the manufacturer if at all.
Wilderness
This article is accurate and true to the best of the author's knowledge. Content is for informational or entertainment purposes only and does not substitute for personal counsel or professional advice in business, financial, legal, or technical matters.
Questions & Answers
Question: I cannot turn the power off as it is a storage facility. All the lights are sensors. If I cannot turn the power off, how do I safely change out the ballast? My electrician told me he does it "hot" as he doesn't even feel a 120v shock anymore. That sounds crazy.
Answer: You can turn the power off by turning off the breaker that feeds the circuit. While there ARE circumstances that deny any real possibility of turning off power (an active operating room, perhaps), it is very nearly always possible. Inconvenient, yes, but then so is being shocked or dying. The point is that if you are not comfortable working hot (and you probably should NOT be) then don't do it.
But if not, the only choice is to leave it unchanged or do it hot, as your electrician mentioned. If that is chosen, unwire the light you want to change, make any changes and re-connect any ground wires, the neutral and the hot wire; in that order.
Question: Why are the yellow neutral wires hot in a 2 build fluorescent fixture and the bulbs will not light, the end of one at the hot leads just glows a little?
Answer: First, the yellow wires coming out of a ballast and going to a fluorescent lamp are not "neutrals" as they do not terminate on the neutral bar in a panel. They carry current derived from the ballast, not from the power company.
The voltage applied to a fluorescent lamp ranges as high as 400 volts to start with, decreasing to around a hundred or even less for shorter lamps.
It sounds like you have a bad ballast. Instructions on replacing a fluorescent ballast can be found at https://hubpages.com/home-improvement/How-To-Repla... or an alternative is to replace the tubes with led lamps. Instructions for this can be found at https://hubpages.com/home-improvement/replace-or-r...
Question: I have a square fixture with two U shaped bulbs. Does this type of fixture have a ballast?
Answer: Yes, it does. It may be a little more difficult to find, though, but should still be accessible without taking the entire fixture down and apart. Look around and try to find a plate or something that can be removed - quite possibly in one corner rather than the center of the fixture.
Question: After changing the fluorescent ballast, one bulb works, and the other does not. Any suggestions? I have checked all connections and the bulbs are new.
Answer: Possibly a bad tombstone - the fitting that the lamp fits into. If it is wired correctly and the bulbs are good (you might swap the bulbs to see if the same position in the fixture remains unlit) that pretty much leaves a bad ballast, even though it's new.
Question: Can I use electrical tape to just tape the ballast to the fixture if I've lost the screw to hold it in place?
Answer: Not a good idea at all: ballasts get pretty warm and eventually (probably sooner than later) the tape is going to release the ballast and let it fall. Use a screw, either one identical to the first one or a small self-tapping screw that will make its own hole in the fixture housing.
© 2012 Dan Harmon
Dan Harmon (author) from Boise, Idaho on December 22, 2016:
If everything is the same, the only thing I can think of is that you have a ballast intended for 277 volts instead of the normal house 102 volts. You might check that.
If not an improper ballast, check all splices for loose connections and double check that the wires go to the tombstones where you think they do - sometimes they get turned inside hidden areas and don't do what you think they do.
You haven't damaged a tombstone in the work process, have you? Other than these things I'm at a loss.
Sun State on December 22, 2016:
Read it, replaced new ballast exactly the same way the old was wired, but the tubes only light up with half the brightness they should. Trying to change a 2 tube T8 ballast in laundry room. Rechecked everything with wiring diagram on ballast, and it is the same. What am I not seeing?
Penelope Hart from Rome, Italy on June 10, 2012:
Read it and tried to translate to my companion 'electricista' who nodded a sort of yes, yes yes all the time. Thanks goodness for electricians. I can't get my had round it all. Seems so complicated.
Surely an extremely helpful Hub!
How To Install A Ballast For Fluorescent Lighting
Source: https://dengarden.com/home-improvement/How-To-Replace-A-Flourescent-Ballast
Posted by: williamsterettly1961.blogspot.com
0 Response to "How To Install A Ballast For Fluorescent Lighting"
Post a Comment